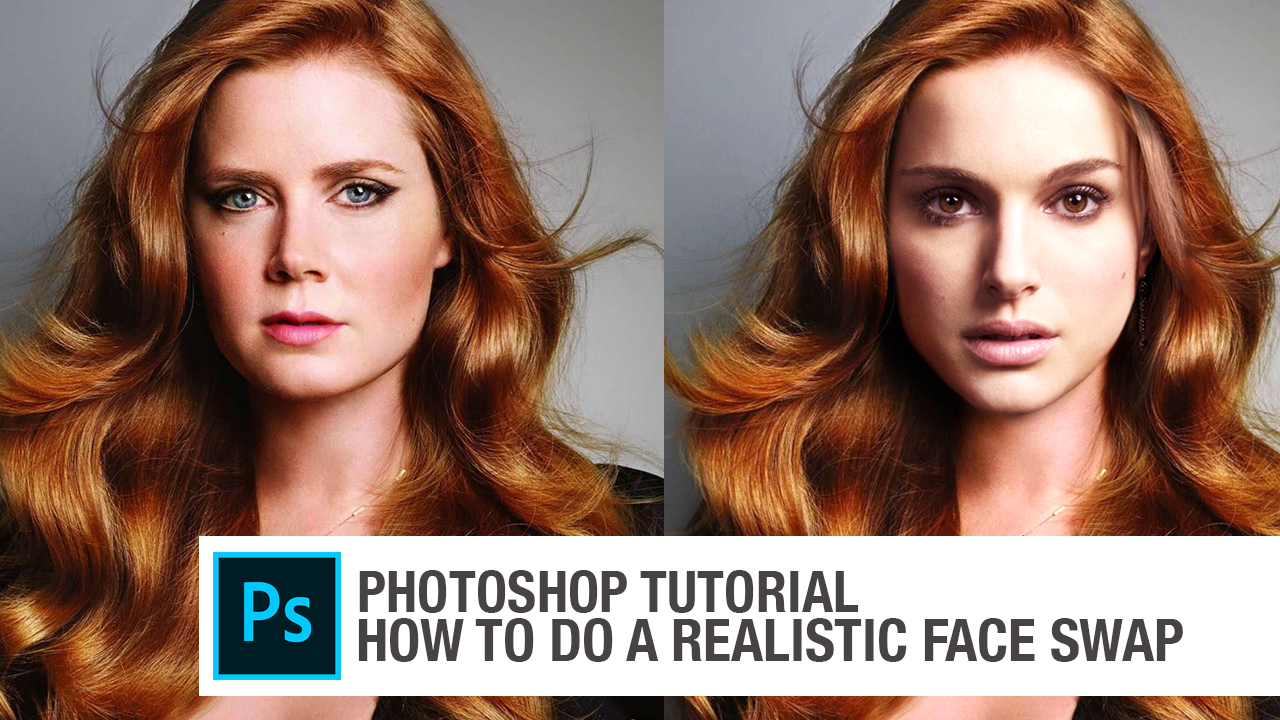
Starting to swap faces in Photoshop can be really fun and a bit challenging. It doesn’t matter if you’re new to it or already good at designing – learning how to do this gives you a bunch of cool ideas to be creative. In this guide, we’ll go through every step together. We’ll share cool tips, advice, and answer questions you might have. Let’s explore the world of digital magic and see how amazing face swapping in Photoshop can be!

Understanding the Basics of Face Swapping
In this part, we’ll talk about the basic ideas to help you understand face-swapping better. We’ll cover things like adjusting layers and making sure facial features match up. Paying attention to these aspects is important for a successful face-swapping experience.
Making faces look real in Photoshop is like putting together a puzzle. Imagine each part of the face as a puzzle piece, and you’re the expert puzzle solver. Your job is to arrange these pieces perfectly so that the face looks natural and smooth.
As you go through this part of the process, you’ll find some tools and tricks that make arranging facial features super easy. Think of it like having a set of tools in Photoshop that helps you tweak the details of the face. Whether it’s adjusting an eyebrow or shaping a smile, every small thing matters, and these tools let you make those adjustments precisely.
Once you get the hang of swapping faces, keeping them looking natural becomes really easy. It’s not just about switching faces; it’s about making sure the new features blend perfectly with the original picture. By paying close attention to details and using the tools carefully, you’ll create face swaps that not only look amazing but also make people marvel at how real and cool your creations are in the world of Photoshop.
Step-by-Step Guide: How To Face Swap In Photoshop (Quick Method)
It’s so straightforward that everyone can join in on the excitement! Let’s break it down into four simple steps:
- Choose Your Subjects: Employ the Marquee Tool to pick out the faces you’d like to swap.
- Copy and Paste the Faces: Once you’ve selected your subjects, copy and paste them onto a new layer.
- Resize and Position the Faces: Utilize the Move Tool to adjust the size and position of the faces, ensuring they naturally fit onto the new layer.
- Blend the Faces Together: Harness the power of layer opacity to seamlessly blend the faces until they appear as if they belong to the same person.
- And there you have it! In just four easy steps, you’ve mastered the art of face swapping, bringing a touch of creativity and fun to your photos.

More Classic Method
Step 1: Get Your Photos Ready
Start by opening both pictures in Photoshop. Put them next to each other and zoom in on the photo with the face you want to use. For example, let’s say you want to replace the face of the man o with the face of the other man.
Step 2: Choose the Face to Swap
Use the Quick Selection tool to pick the face you want to swap. It doesn’t have to be perfect right away, and you can try other tools like the Lasso tool and Move tool too.
Step 3: Make Your Selection Better with a Mask
Click on the Quick Mask button on the left or in the Layers panel. Now, use the Brush tool to improve your selection. The chosen area will have a red layer mask. Painting with white adds pixels, and black removes pixels. You can switch between black and white by pressing the X key.
Step 4: Copy and Paste the Face
Click the Quick Mask button again when you’re done. This takes you back to regular editing mode. Copy the face layer (Ctrl + C) and paste it onto the background layer (Ctrl + V). Put the face layer in the right spot to replace the original head. Now, you’ve got a new face as a new layer, making a cool picture with a head and body from different people.
By following these easy steps, you can have a blast swapping faces in Photoshop and create some exciting and unique pictures!

Quick Tips
You may need to read these quick tips to make the face swapping progress more fun.
Using Marque Tool Effectively
To use the Rectangular Marquee tool, just press the “M” key on your keyboard. If you want the Elliptical Marquee, press “M,” and while making your selection, hold down the Shift key. You can switch between the different Marquee tools by holding Shift and pressing “M” multiple times. It’s as easy as that!
Quick Selection Tool tips
To pick objects in your picture, go to the Object Selections Options bar, and make sure the Object Finder is on. When it’s active, you’ll see a spinning refresh icon next to the Object Finder. Just move your cursor over and click on the object or area you want to choose in your image. Usually, the Object Finder is already turned on by default.
If you don’t want the tool to automatically pick, turn off the Object Finder in the Options bar. After that, pick a selection mode: Rectangle or Lasso. If you choose Rectangle, drag your cursor to create a rectangular selection around the object. If you go with Lasso, draw a rough lasso outside the object’s boundary or area.
Aligning Eyes and Facial Features
When swapping faces, it’s important to get the eyes and other facial features in the right place. Take a close look and adjust things like where the eyes are looking, the position of the eyebrows, and the alignment of the lips. This step helps the new face fit naturally in the original picture.
Matching the Color of the New Face
To make sure the new face blends in well, match its color with the original image. You can do this by adjusting the color manually, using tools like selective color correction or Photoshop’s “Match Color” feature. The goal is to make the new face look like it belongs in the same place as the original.
Blending the New Face with the Background
For a smooth transition between the new face and the background, it’s crucial to blend them together. Select both layers and use Photoshop’s “Auto Blend Layers” feature. Experiment with different blending modes and make fine adjustments using masks and adjustment layers.
Fine-tuning the Face Swapped Image
To give your face swap that final touch, spend some time fine-tuning. Adjust the contrast, add shadows or highlights, refine skin textures, and make any necessary touch-ups. It is great idea to take your time to assess and re-assess if you want to get the best result. Remember, focusing on small details is important to make your face swap look realistic and professional.
Erasing Unwanted Parts of the New Face
Once the new face is in the right spot and has the right color, it’s time to clean up any parts you don’t want. Think of it like using an eraser to carefully remove areas that overlap with other things, such as accessories, hat, headset, or clothing. Pay attention to details and make sure the edges are smooth for a polished look.
Wrapping Up: Your Path to Creative Success
As we finish our journey into face swapping in Photoshop, keep in mind that practicing and trying new things are your best friends. Don’t be afraid of challenges, cheer for yourself when you do well, and let your imagination fly high. The world of digital transformation is ready for you, and you’ve got the tools to make the most of it!
